

Oracle Database 23ai introduces the next generation of Oracle client software with improved AI-ready capabilities, enhanced security, and better performance. Whether you’re preparing a server for SQL*Plus, RMAN, Data Pump, or application connectivity, installing the Oracle Database 23ai Client is straightforward.
This guide walks through the complete installation process on Oracle Linux using the graphical installer.


Prerequisites
Before starting the installation, ensure the following requirements are met.
- Oracle Linux 8 or later
- X11 Display configured (for GUI installation)
- Oracle software owner created
- Required packages installed
- Oracle Base directory created
- Minimum 3 GB free disk space
Example directory structure:
Oracle Base : /u01/app/oracle
Oracle Home : /u01/app/oracle/product/23.0.0/client_2
Step 1 – Launch the Installer
Navigate to the extracted client software.
cd /home/oracle/install/clientStart the installer.
./runInstallerThe Oracle Database Client Installer opens.
Step 2 – Select Installation Type
Choose the installation type according to your requirements.
Available options include:
- Administrator (Recommended)
- SQL*Plus
- Oracle Net
- Data Pump
- Recovery Manager (RMAN)
- Oracle utilities
- Management tools
- Runtime
- Custom
For most DBA environments, select Administrator.
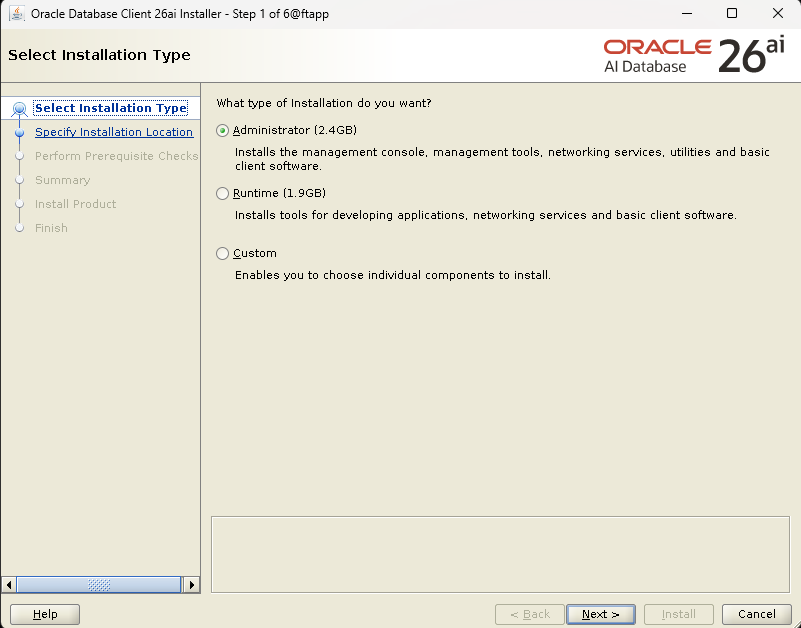
Step 3 – Specify Installation Location
Configure Oracle Base and Oracle Home.
Example:
Oracle Base:
/u01/app/oracle

Oracle Home:
/u01/app/oracle/product/23.0.0/client_2
Click Next.
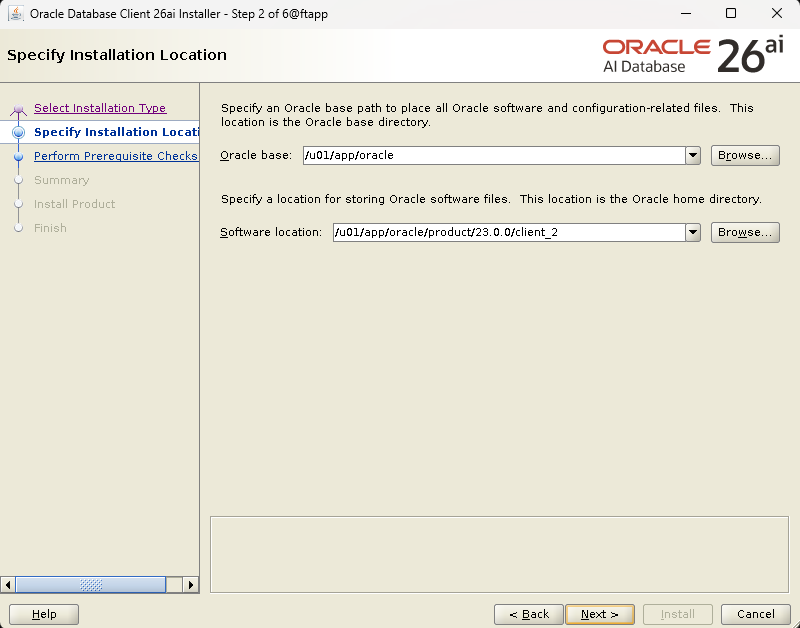
Step 4 – Perform Prerequisite Checks
The installer validates:
- Available disk space
- Operating system version
- Kernel parameters
- Required packages
- User groups
- Environment configuration
If all checks pass, continue by clicking Next.
If warnings appear, review and resolve them before proceeding.
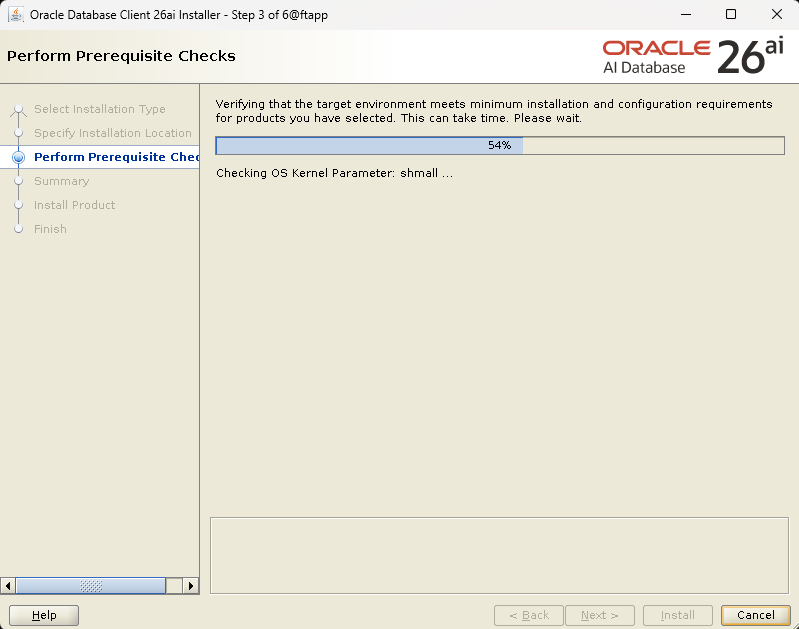
Step 5 – Review Installation Summary
Verify all selected options.
Typical summary:
| Setting | Value |
|---|---|
| Installation Type | Administrator |
| Oracle Base | /u01/app/oracle |
| Oracle Home | /u01/app/oracle/product/23.0.0/client_2 |
| Disk Space | 2.4 GB Required |
Click Install to begin copying files.
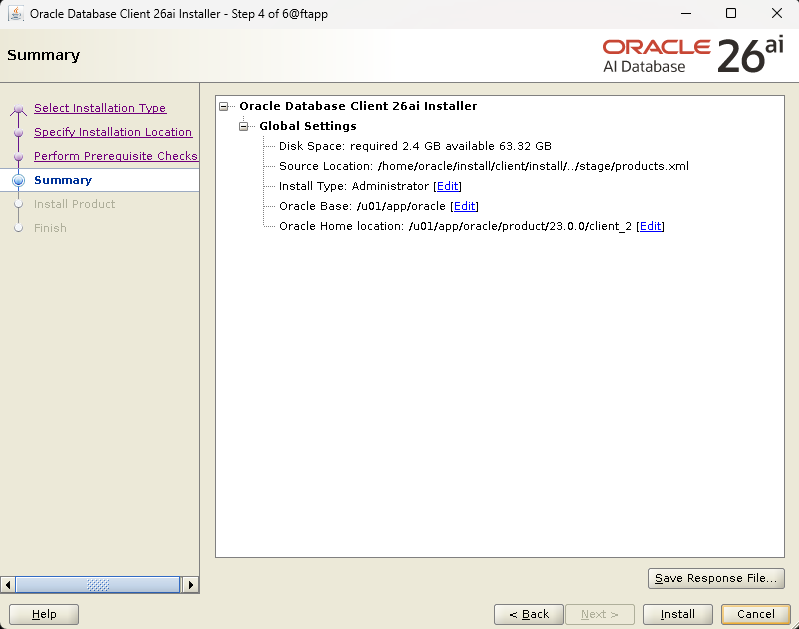
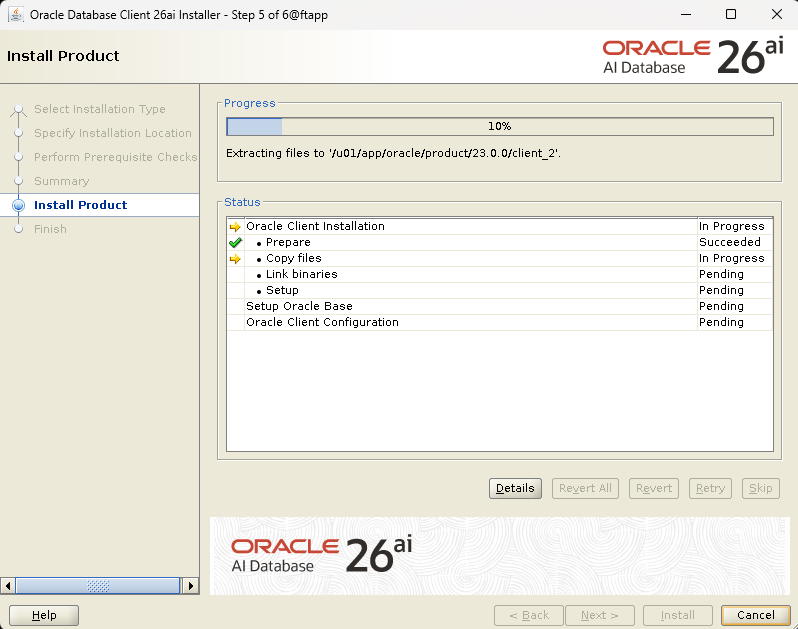
Step 6 – Install Oracle Client
The installer performs several operations.
- Prepare installation
- Copy files
- Link binaries
- Configure Oracle Base
- Configure Oracle Client
The installation progress window displays the current status.
Step 7 – Verify the Installation
Load the Oracle environment.
export ORACLE_HOME=/u01/app/oracle/product/23.0.0/client_2
export PATH=$ORACLE_HOME/bin:$PATH
Verify the installation.
sqlplus -vExample output:
SQL*Plus: Release 23.0.0.0.0 Production
Version 23.x.x.x.x
Verify Oracle Net.
lsnrctl versionVerify Data Pump.
expdp help=yVerify RMAN.
rman target /Optional – Configure Environment Variables
Add the following to the Oracle user’s profile.
export ORACLE_BASE=/u01/app/oracle
export ORACLE_HOME=/u01/app/oracle/product/23.0.0/client_2
export PATH=$ORACLE_HOME/bin:$PATH
export LD_LIBRARY_PATH=$ORACLE_HOME/lib
export TNS_ADMIN=$ORACLE_HOME/network/admin
Reload the profile.
source ~/.bash_profileConfigure Oracle Net
Create or copy the network configuration files into:
$ORACLE_HOME/network/adminCommon files include:
- tnsnames.ora
- listener.ora
- sqlnet.ora
Test connectivity.
tnsping ORCLConnect to the database.
sqlplus system@ORCLCommon Installation Issues
Display Error
Could not execute auto check for display colors.Solution:
export DISPLAY=<hostname>:0.0
xhost +
Missing Packages
Install required packages.
sudo dnf install oracle-database-preinstall-23aiPermission Issues
Ensure Oracle owns the installation directories.
chown -R oracle:oinstall /u01/app/oracle
chmod -R 775 /u01/app/oracle
Insufficient Swap Space
Increase swap if prerequisite checks fail.
free -h
swapon --show
Post-Installation Checklist
- Oracle Client installed successfully
- SQL*Plus verified
- RMAN verified
- Data Pump verified
- Oracle Net configured
- Environment variables configured
- TNS connectivity tested
Conclusion
Installing the Oracle Database 23ai Client is a simple process when the operating system prerequisites are satisfied. The Administrator installation provides all essential tools required by DBAs, including SQL*Plus, RMAN, Data Pump, Oracle Net, and other utilities. After installation, verify the client binaries, configure Oracle Net, and test database connectivity to ensure the client environment is ready for production use.


