

Keeping your Oracle Database Client up to date is essential for maintaining security, stability, and compatibility with Oracle Database environments. Oracle regularly releases Release Updates (RUs) that include critical security fixes, bug fixes, and performance improvements.
In this guide, you’ll learn how to patch Oracle Database Client 19c to Release Update 19.32 (Patch 39418910) on Microsoft Windows x64 using OPatch 12.2.0.1.52. The guide includes screenshots for every major step to make the process easy to follow.


Patch Information
The Release Update used in this guide is:
| Property | Value |
|---|---|
| Patch Number | 39418910 |
| Patch Name | Windows Database Bundle Patch 19.32.0.0.260721 |
| Release Update | 19.32.0.0.260721 |
| Bundle | Oracle Database 19.32.0.0.260721 WINDBBP |
| Platform | Microsoft Windows x64 (64-bit) |
| Product | Oracle Database Family |
| OPatch Version | 12.2.0.1.52 |
This Release Update is available under Oracle’s General Support program for Oracle Database 19c on Microsoft Windows x64.
Prerequisites
Before starting the patching process, ensure you have:
- Oracle Database Client 19c installed
- Patch 39418910 downloaded from My Oracle Support
- Latest OPatch 12.2.0.1.52
- Administrator privileges
- Oracle applications (SQL Developer, TOAD, etc.) closed
- At least 8 GB of free disk space
- A backup of the Oracle Home directory (recommended)
Step 1: Extract the Release Update Patch
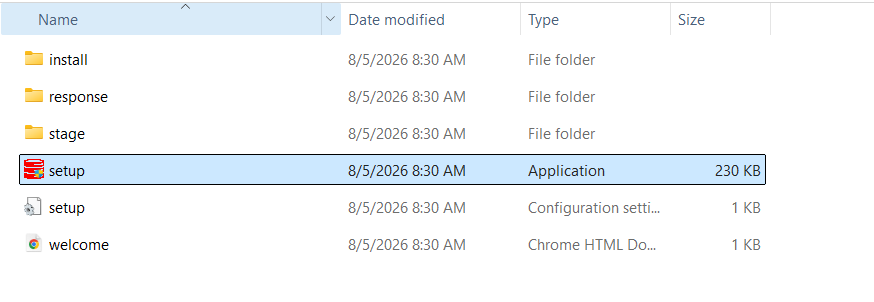
Download Patch 39418910 from My Oracle Support and extract it to a local directory.
Example location:
D:\client\p39418910_190000_MSWIN-x86-64\After extraction, you’ll see the patch directory and setup files.
Step 2: Verify the Current OPatch Version
Before applying the Release Update, verify the installed OPatch version.
cd %ORACLE_HOME%\OPatch
opatch version
Example output:
OPatch Version: 12.2.0.1.15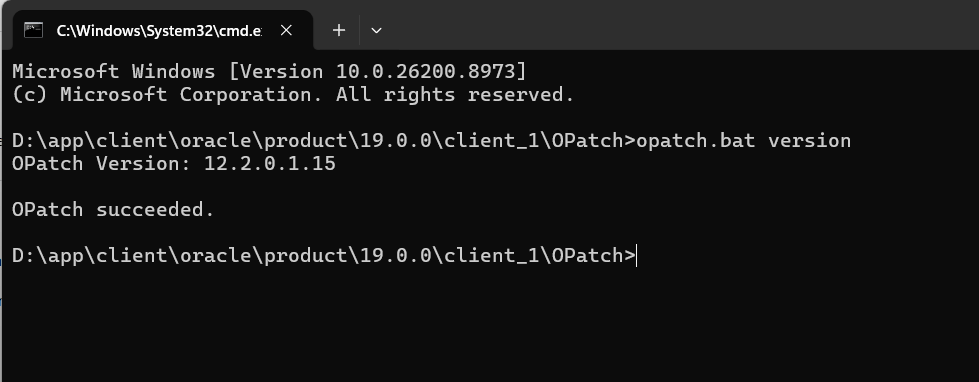
Since Oracle recommends using the latest OPatch version, upgrade OPatch before applying the Release Update.
Step 3: Upgrade OPatch
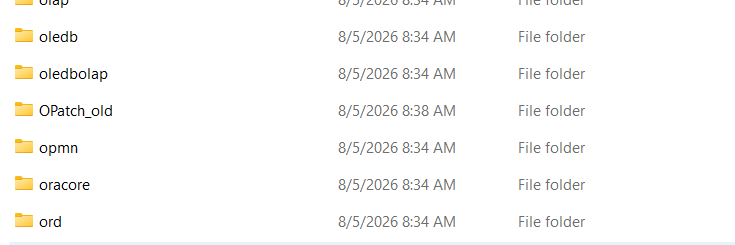
Rename the existing OPatch directory.
Example:
OPatchRename to:
OPatch_oldCopy the new OPatch directory (Version 12.2.0.1.52) into your Oracle Home.
Step 4: Verify the New OPatch Version
Verify that the new OPatch version has been installed successfully.
cd %ORACLE_HOME%\OPatch

opatch version
Expected output:
OPatch Version: 12.2.0.1.52

OPatch succeeded.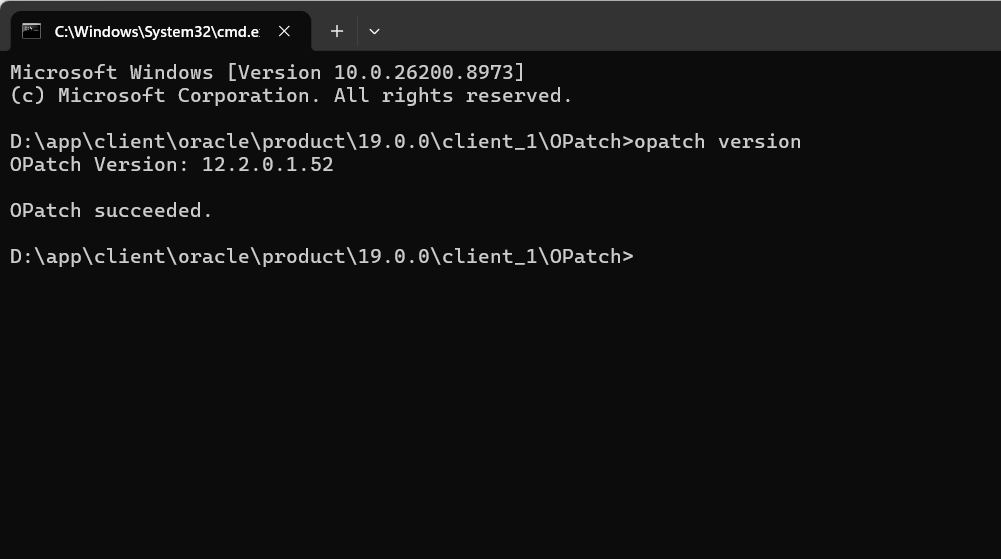
Step 5: Check for Patch Conflicts
Navigate to the extracted patch directory.
cd D:\client\p39418910_190000_MSWIN-x86-64\39418910Run the prerequisite conflict check.
D:\app\client\oracle\product\19.0.0\client_1\OPatch\opatch prereq CheckConflictAgainstOHWithDetail -ph ./Expected output:
Prereq "checkConflictAgainstOHWithDetail" passed.

OPatch succeeded.
This confirms that the Release Update can be safely applied.
Step 6: Apply the Release Update
Apply the Release Update.
D:\app\client\oracle\product\19.0.0\client_1\OPatch\opatch applyThe installer performs several checks before patching:
- Oracle Home validation
- Inventory verification
- Backup of existing binaries
- Component dependency checks
- Release Update installation
When prompted:
Do you want to proceed? [y|n]Enter:
yNext prompt:
Is the local system ready for patching?Enter:
yThe patch installation will begin.
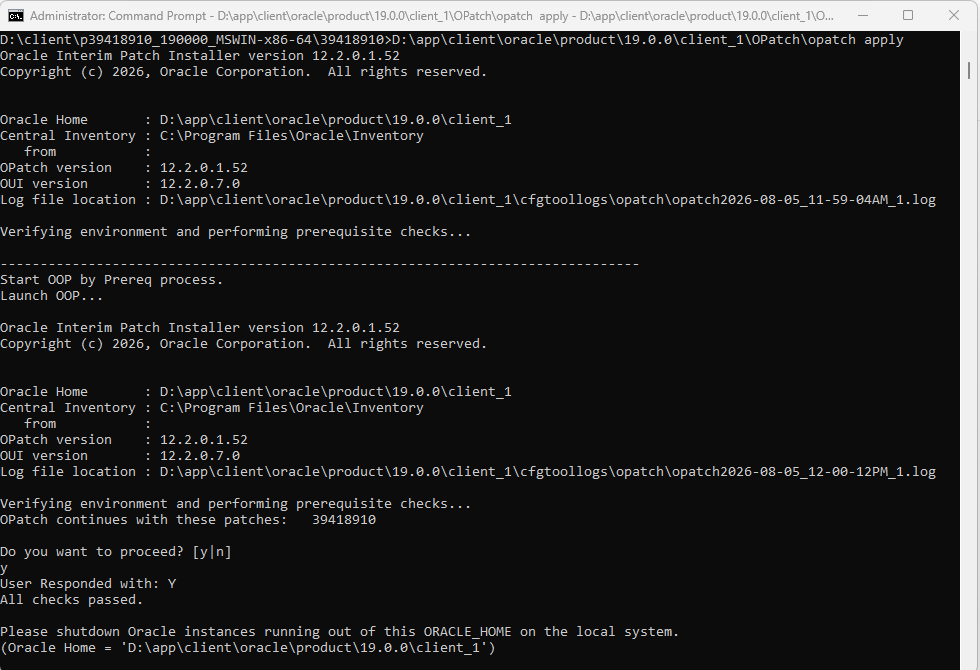
Step 7: Patch Installation
During installation, Oracle updates many Oracle Client components, including:
- Oracle Net Client
- SQL*Plus
- RMAN
- OCI
- JDBC
- ODBC
- Java
- Oracle Wallet
- Oracle Networking
- Oracle Client libraries
Components that are not installed in the Oracle Home are automatically skipped.
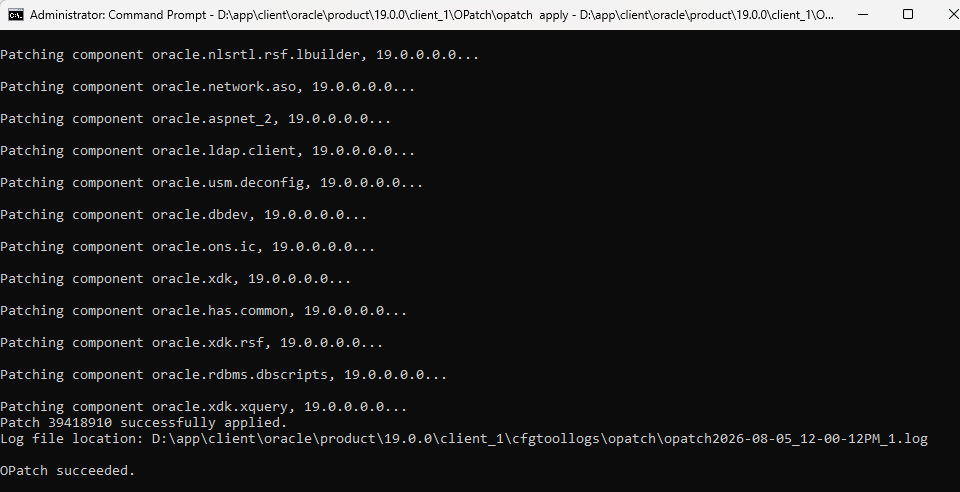
After a few minutes, you should see:
Patch 39418910 successfully applied.

OPatch succeeded.
Screenshot – Patch Successfully Applied
(Insert Screenshot: Patch 39418910 successfully applied)
Step 8: Verify the Installed Patch
Verify that the Release Update has been installed successfully.
opatch lspatchesExpected output:
39418910;
Windows Database Bundle Patch :
19.32.0.0.260721
(REL-JUL260721)
This confirms that Oracle Database Client has been successfully upgraded to Release Update 19.32.
Common Issue: Insufficient Disk Space
One of the most common issues during patching is insufficient free disk space.
Example error:
Prerequisite check "CheckSystemSpace" failed

Required amount of space (7586 MB) is not available.

OPatch failed with error code = 73
Solution
- Free at least 8 GB of disk space.
- Close applications using Oracle Home.
- Retry the patch.
Verify SQL*Plus
After patching, verify that SQL*Plus is still functioning correctly.
sqlplus -vExample output:
SQL*Plus: Release 19.0.0.0.0Best Practices
- Always back up the Oracle Home before patching.
- Upgrade OPatch before applying a Release Update.
- Run
CheckConflictAgainstOHWithDetailbefore patching. - Ensure no applications are using the Oracle Home.
- Keep a copy of the OPatch logs for future troubleshooting.
- Verify the installed Release Update using
opatch lspatches.
Conclusion
Patching Oracle Database Client 19c to Release Update 19.32 (Patch 39418910) on Windows is a straightforward process when proper preparation steps are followed. By upgrading OPatch, validating patch conflicts, applying the Release Update, and verifying the installation, you can keep your Oracle Client environment secure, stable, and fully supported.
Regularly applying Oracle Release Updates helps protect your systems against security vulnerabilities, resolves known issues, and ensures compatibility with the latest Oracle Database features and fixes. This Release Update targets Oracle Database 19c on Microsoft Windows x64 and delivers the Windows Database Bundle Patch 19.32.0.0.260721 (Patch 39418910)
Oracle Instant Client Downloads
Installing Oracle Database Client 19c: A Step-by-Step Visual Guide



Comments 2