

If you’re patching Oracle Database Client 19c on Windows using OPatch and encounter the message “Unable to lock Central Inventory. OPatch will attempt to re-lock.”, don’t panic. This is a common issue caused by insufficient privileges when accessing the Oracle Central Inventory.
In this article, you’ll learn why this error occurs and how to fix it quickly.


Problem
While applying an Oracle Release Update (RU), OPatch may display the following message:
Oracle Home       : D:\app\client\oracle\product\19.0.0\client_1
Central Inventory : C:\Program Files\Oracle\Inventory

Verifying environment and performing prerequisite checks...

Unable to lock Central Inventory. OPatch will attempt to re-lock.
OPatch may continue retrying, or the patch process may fail because it cannot obtain exclusive access to the Oracle Central Inventory.
Why Does This Happen?
Oracle stores installation information in the Central Inventory, typically located at:
C:\Program Files\Oracle\InventoryDuring patching, OPatch needs exclusive write access to update the inventory. If the Command Prompt is not running with Administrator privileges, Windows may prevent OPatch from locking or modifying the inventory.
Other possible causes include:
- Command Prompt not opened as Administrator
- Another Oracle Installer or OPatch session already running
- Antivirus software temporarily locking files
- Another user performing Oracle installation or patching
The most common cause is insufficient Windows privileges.
Solution
Run the Command Prompt with Administrator privileges before executing any OPatch commands.
Step 1: Close the Current Command Prompt
If OPatch is currently running, close the Command Prompt window.
Step 2: Open an Elevated Command Prompt
- Click Start.
- Search for Command Prompt.
- Right-click Command Prompt.
- Select Run as administrator.
You should see Administrator: Command Prompt in the title bar.
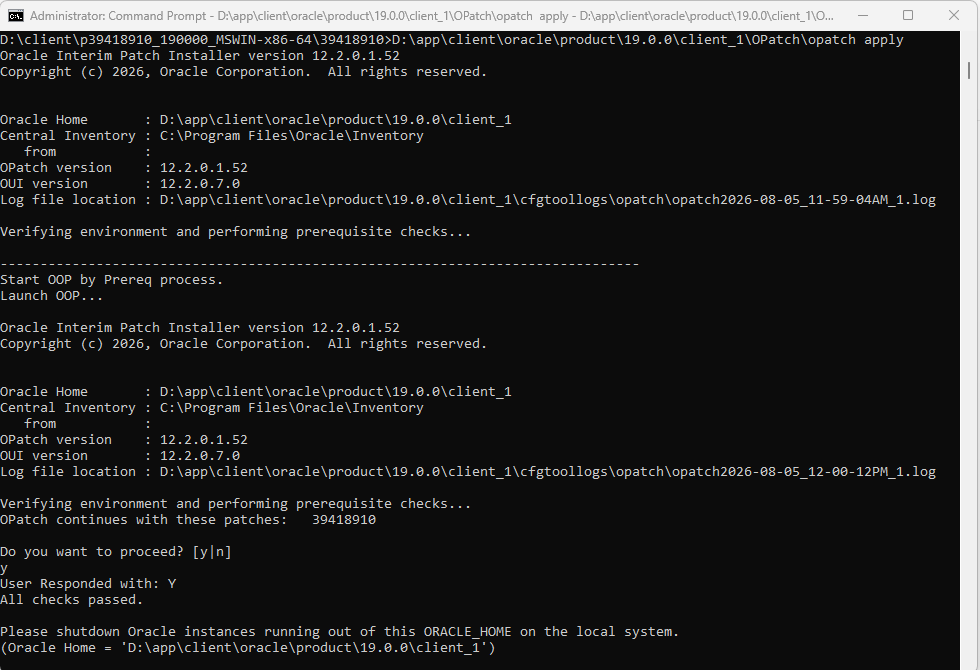
Step 3: Navigate to the Patch Directory
Example:
cd D:\client\p39418910_190000_MSWIN-x86-64\39418910Step 4: Apply the Patch Again
Run:
D:\app\client\oracle\product\19.0.0\client_1\OPatch\opatch applyThe patch should now proceed without inventory locking issues.
Verify Administrator Mode
You can confirm you’re running an elevated Command Prompt by checking the title bar.
It should display:
Administrator: Command PromptIf it only shows Command Prompt, reopen it using Run as administrator.
Additional Checks
If the issue persists after running as Administrator:
- Ensure no other OPatch or Oracle Universal Installer sessions are running.
- Close Oracle applications such as SQL Developer or TOAD that may be using the Oracle Home.
- Temporarily disable antivirus software if it is locking Oracle files.
- Verify that your Windows account has local Administrator privileges.
- Restart the machine if another installation process has left the inventory locked.
Best Practices
- Always run OPatch from an elevated Command Prompt.
- Verify the OPatch version before applying patches.
- Close all applications using the Oracle Client.
- Back up the Oracle Home before patching.
- Review the OPatch log if the issue continues.
Conclusion
The “Unable to lock Central Inventory” message during Oracle Database Client 19c patching is usually caused by running OPatch without Administrator privileges. Opening Command Prompt as Administrator gives OPatch the permissions it needs to update the Oracle Central Inventory and complete the patch successfully.
Following this simple step can prevent one of the most common Windows patching issues and ensure a smooth Oracle Client Release Update process.


