

Installing Oracle Database 26ai RAC is a two-phase process.
After completing Grid Infrastructure in Part 1, this guide walks through Part 2, which covers:
- Oracle AI Database 26ai RAC software-only installation
- RAC database creation using DBCA
- ASM, CDB/PDB, memory, recovery, and post-creation verification
This guide is based on a real production-style installation, with screenshots mapped to every step.
Prerequisites
Before starting Part 2, ensure:
- Oracle Grid Infrastructure 26ai is installed and running
- ASM disk group (
+DATA) is ONLINE - Passwordless SSH is configured for the oracle user
- Oracle Database 26ai software is extracted on node 1
Phase 1: Oracle AI Database 26ai RAC – Software Installation
Step 1: Select Configuration Option

Selection
✅ Set Up RAC Software Only
Why this is important
- Oracle best practice for RAC is:
- Install software only
- Create database using DBCA
- Provides better control and repeatability
Click Next.
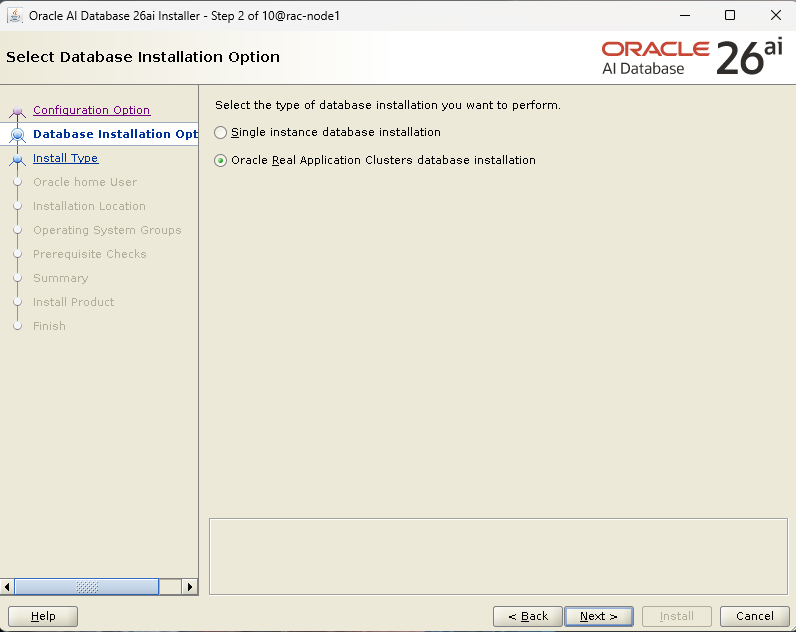
Step 2: Select Database Installation Option
Selection
✅ Oracle Real Application Clusters database installation
Why
- Enables multi-node RAC binaries
- Automatically prepares shared Oracle Home
Click Next.
Step 3: Select List of Nodes

Action
- Select:
rac-node1rac-node2
- OS Username:
oracle - Test SSH connectivity
Expected Result
✅ Successfully established passwordless SSH connectivity
Click Next.
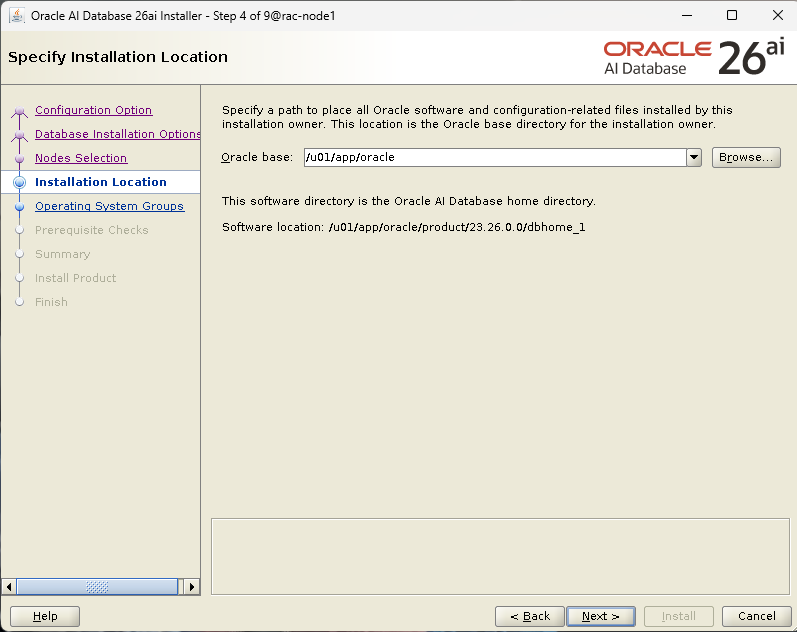
Step 4: Specify Installation Location
Values
- Oracle Base:
/u01/app/oracle - Software Location:
/u01/app/oracle/product/23.26.0.0/dbhome_1
Best Practice
- Separate Grid Home and DB Home
- Aligns with Oracle OFA standards
Click Next.
Step 5: Privileged Operating System Groups
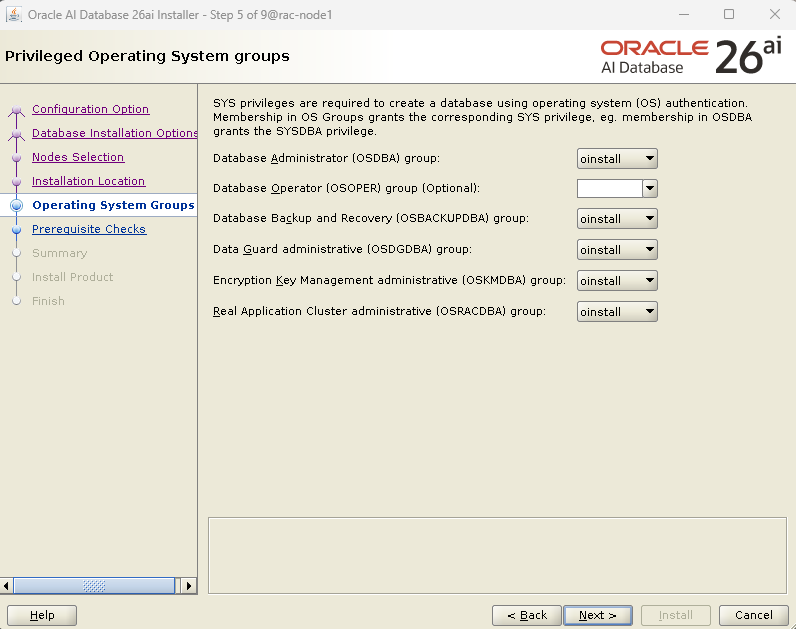
Group Mapping
- OSDBA →
oinstall - OSOPER →
oinstall - OSBACKUPDBA →
oinstall - OSDGDBA →
oinstall - OSKMDBA →
oinstall - OSRACDBA →
oinstall
Click Next.
Step 6: Root Script Configuration
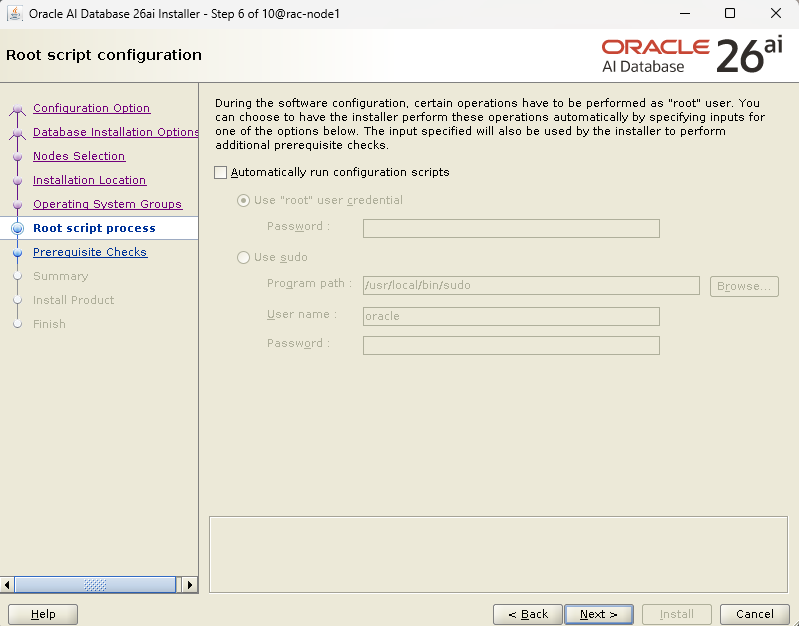
Selection
❌ Do not run scripts automatically
✔ Manual execution
Why
- Preferred in enterprise environments
- Allows validation before root execution
Click Next.
Step 7: Perform Prerequisite Checks
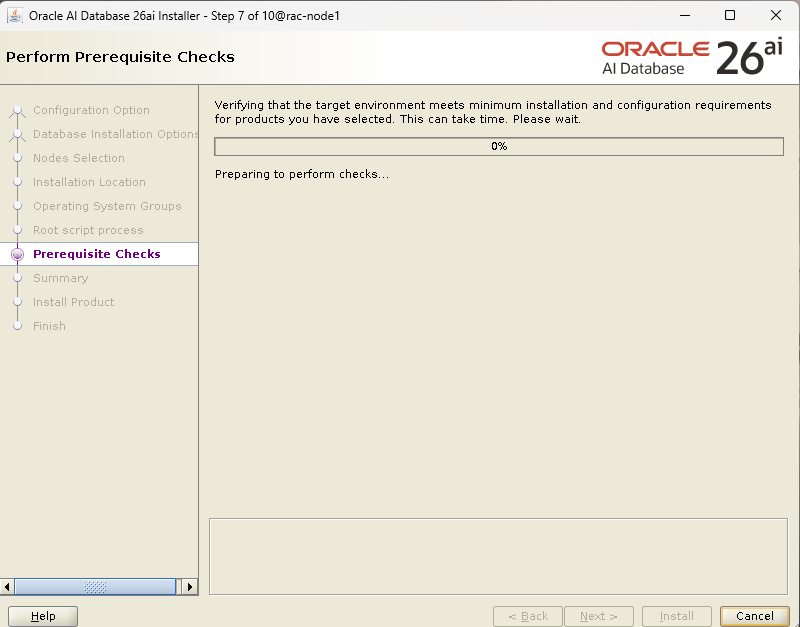
- Allow all checks to complete
- Fix critical issues if any
- Warnings can be reviewed and accepted
Click Next.
Step 8: Summary
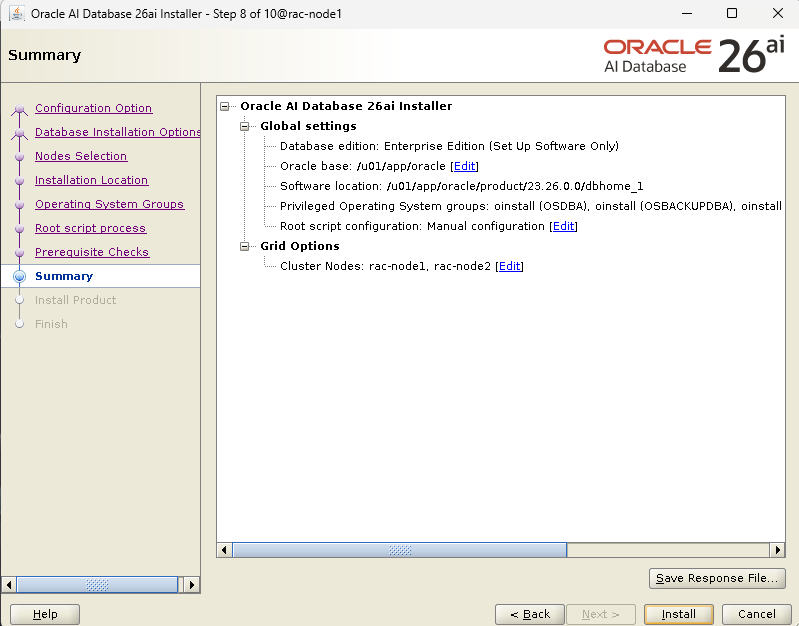
Review:
- RAC nodes
- Oracle Home
- OS groups
- Installation mode
Click Install.
Step 9: Install Product
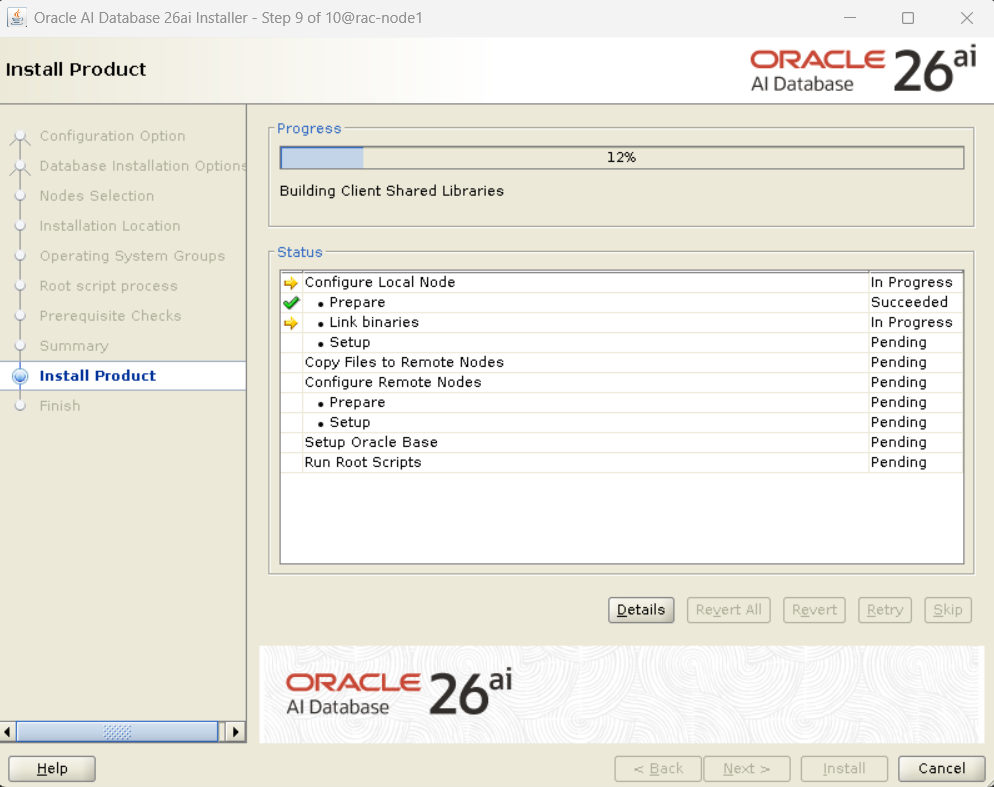
What happens
- Binary linking
- Copy files to remote nodes
- Oracle Base setup
- Root scripts execution prompt
Step 10: Run Root Scripts
When prompted, execute on all nodes as root:
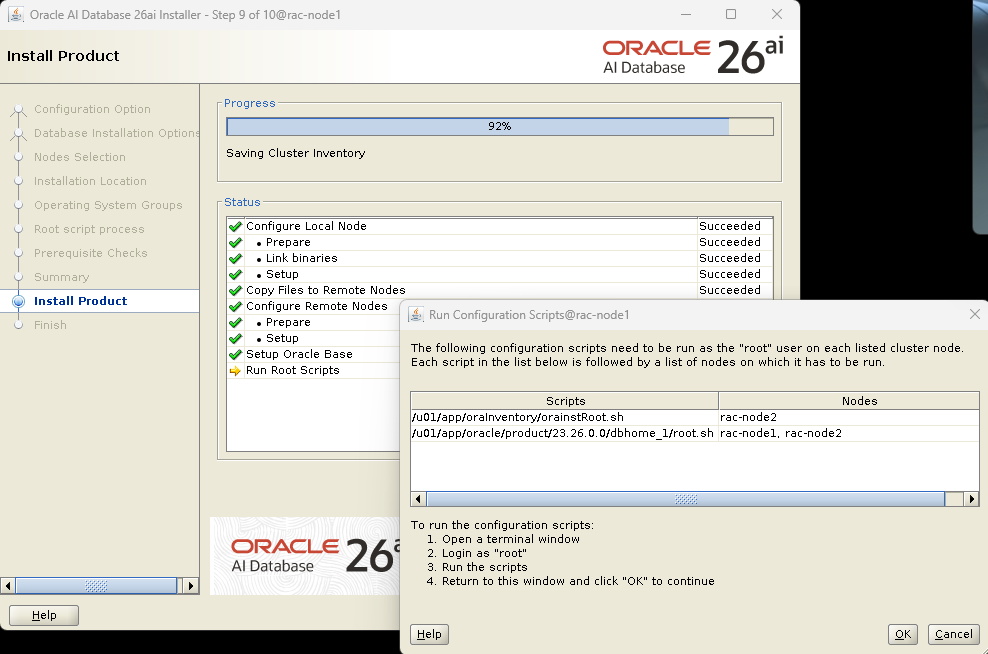
/u01/app/oraInventory/orainstRoot.sh
/u01/app/oracle/product/23.26.0.0/dbhome_1/root.sh
Click OK after completion.
Step 11: Finish – Database Software Installed
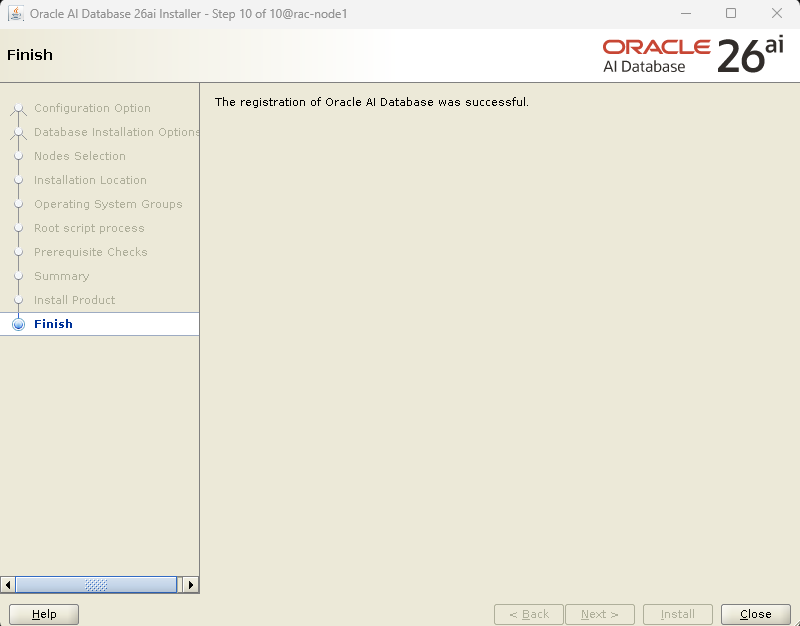
✅ The registration of Oracle AI Database was successful.
At this point:
- RAC database software is installed
- No database is created yet
Phase 2: RAC Database Creation Using DBCA
Step 12: Launch DBCA
As oracle user:
dbca
Step 13: Select Database Operation
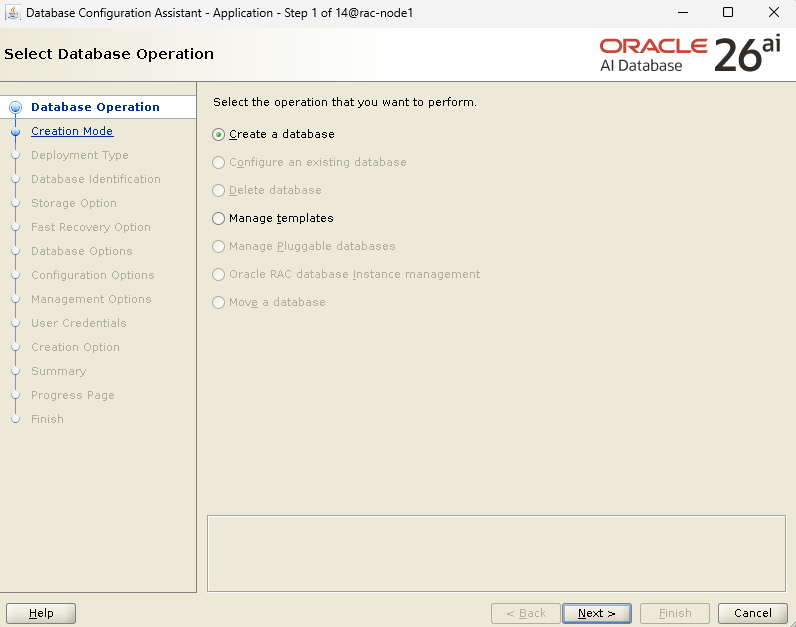
Selection
✅ Create a database
Click Next.
Step 14: Select Database Creation Mode
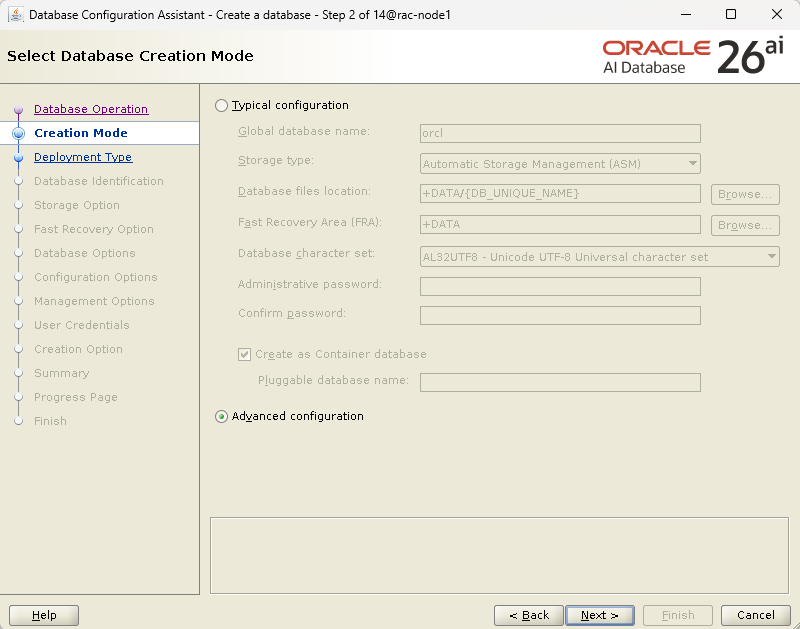
Selection
✅ Advanced configuration
Why
- Full control over:
- CDB/PDB
- Memory
- Storage
- Recovery
Click Next.
Step 15: Select Database Deployment Type
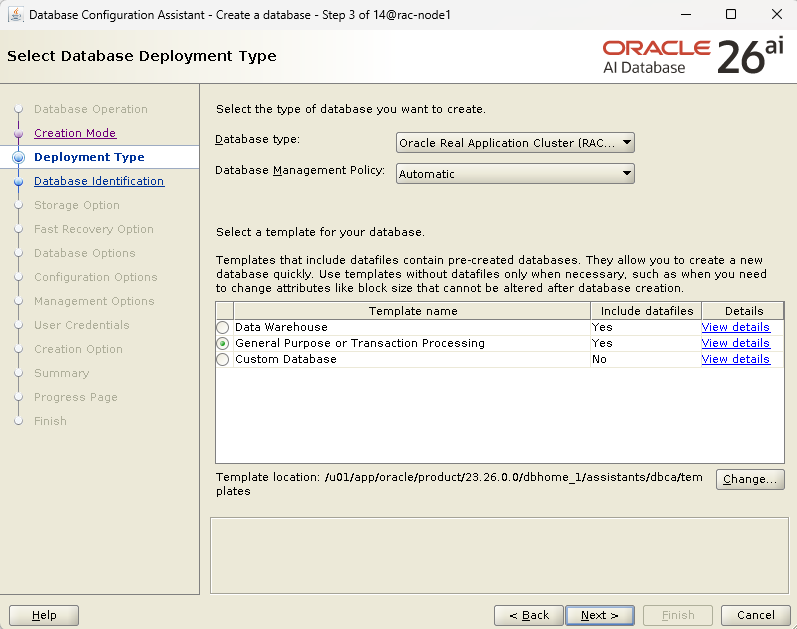
Values
- Database type: Oracle Real Application Cluster (RAC)
- Management policy: Automatic
- Template: General Purpose / Transaction Processing
Click Next.
Step 16: Select List of Nodes
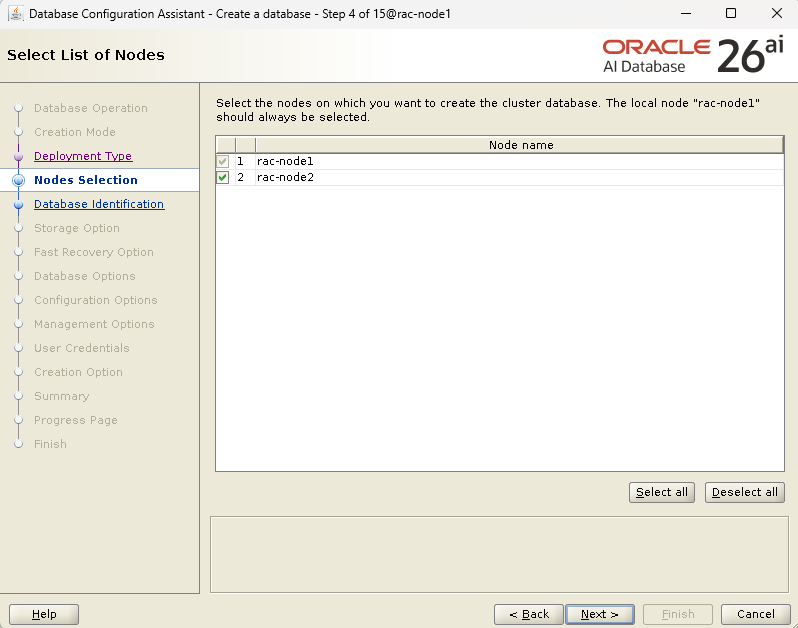
- Select:
rac-node1rac-node2
Click Next.
Step 17: Specify Database Identification
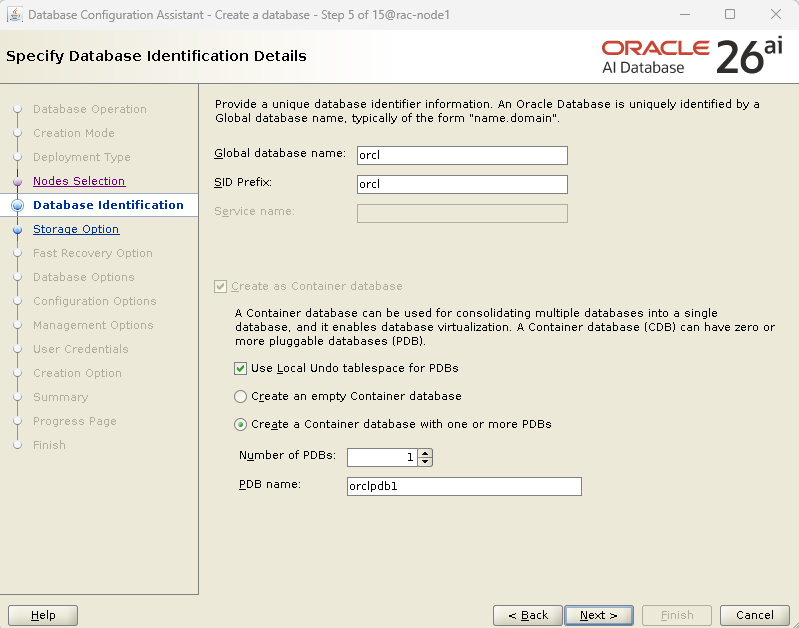
Values
- Global database name:
orcl - SID prefix:
orcl - Create as Container Database: ✔
- PDB name:
orclpdb1 - Number of PDBs:
1 - Use Local Undo for PDBs: ✔
Click Next.
Step 18: Select Database Storage Option
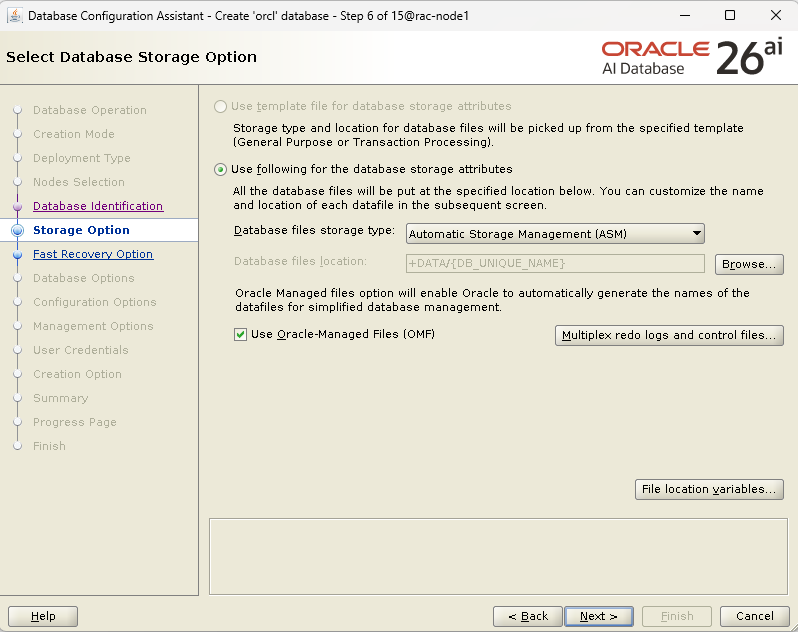
Configuration
- Storage type: ASM
- Disk group:
+DATA - Enable Oracle Managed Files (OMF) ✔
Click Next.
Step 19: Fast Recovery Option
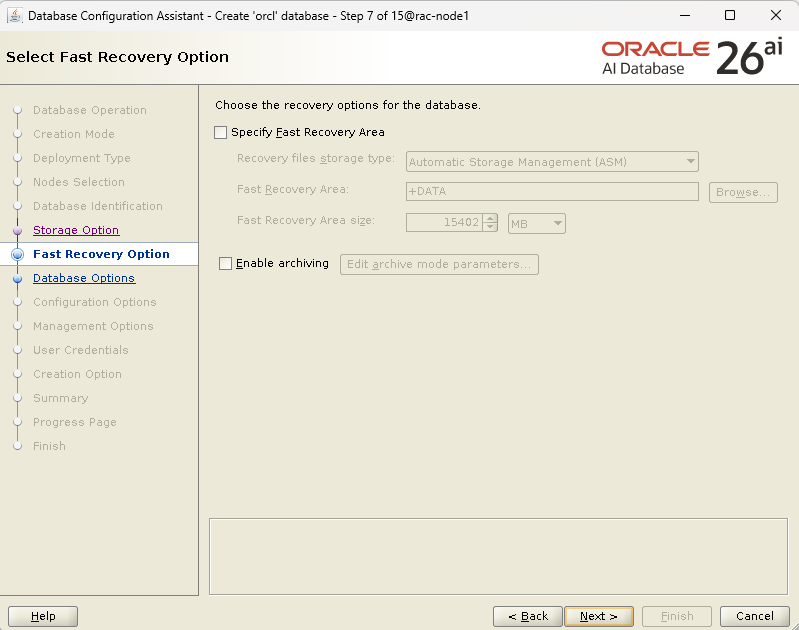
Configuration
- FRA Disk Group:
+DATA - Enable archiving if required for production
Click Next.
Step 20: Oracle Data Vault Option
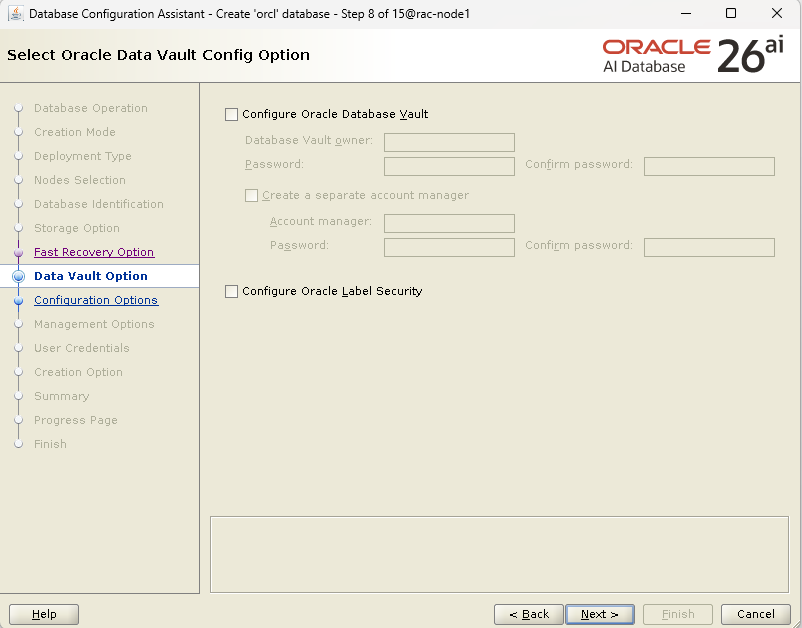
Selection
- Leave unchecked (unless required)
Click Next.
Step 21: Configuration Options (Memory)
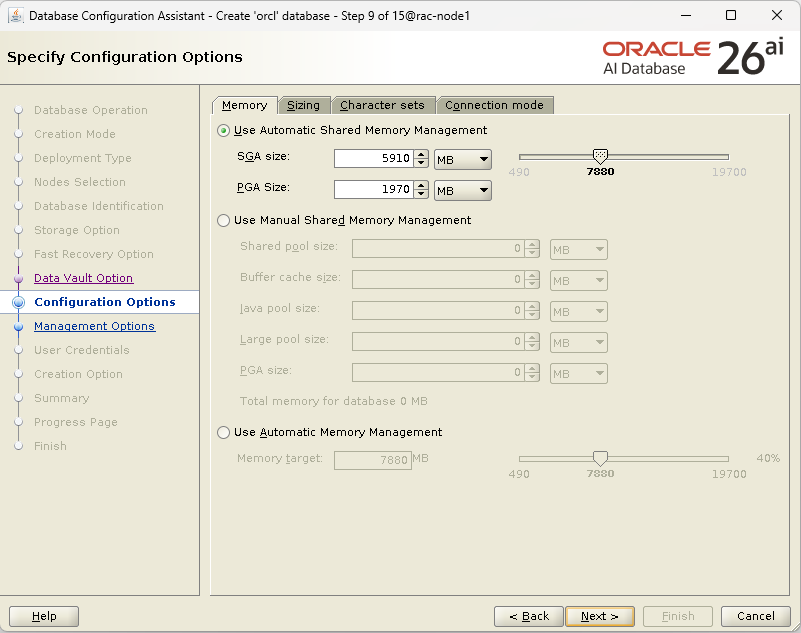
Selection
- Use Automatic Shared Memory Management (ASMM)
- Adjust SGA / PGA based on system RAM
Click Next.
Step 22: Management Options
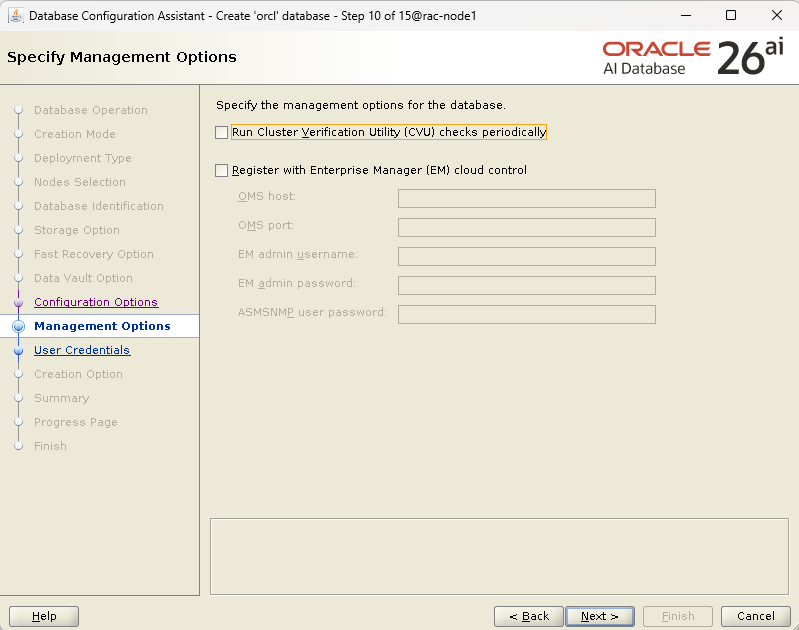
Selection
- Enable CVU periodic checks ✔
- Skip EM Cloud Control (can be configured later)
Click Next.
Step 23: Database User Credentials
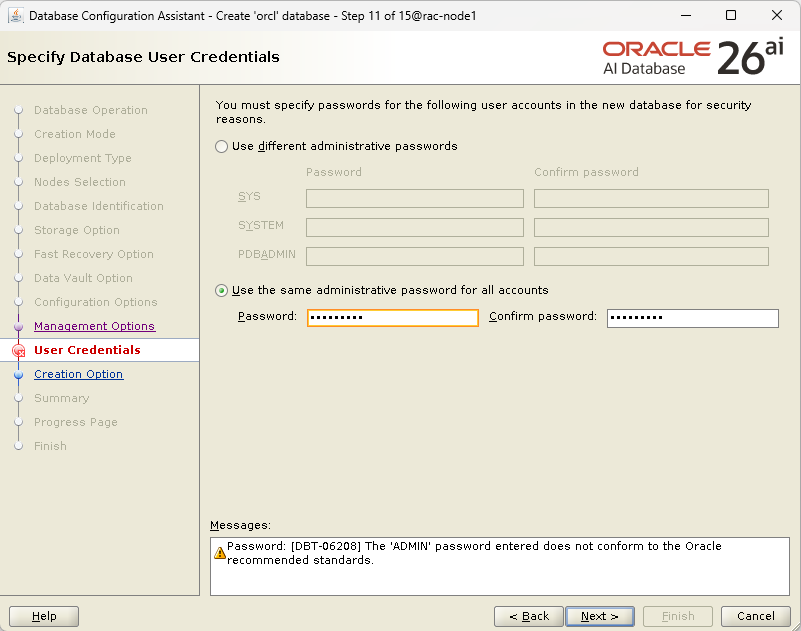
Selection
✅ Use the same administrative password for all accounts
⚠️ Password warning may appear — acceptable per security policy.
Click Next.
Step 24: Database Creation Option
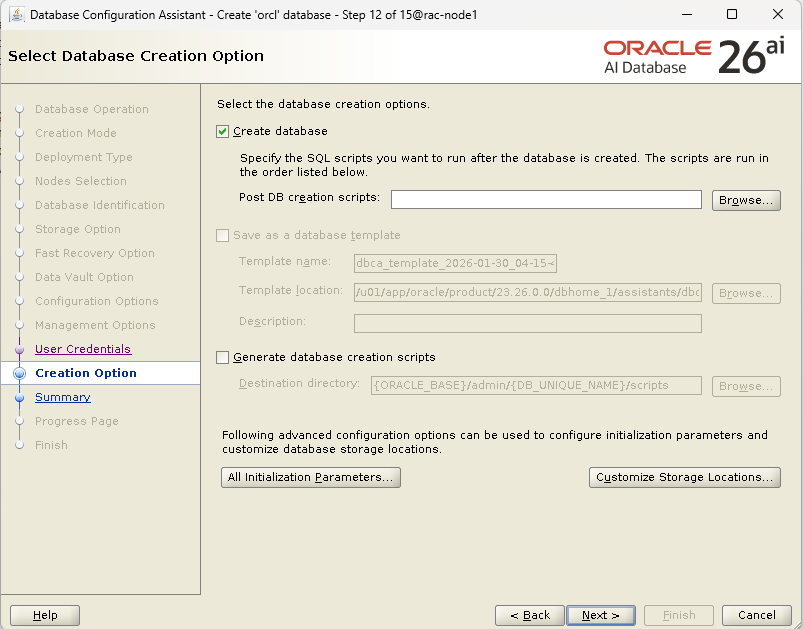
Selection
✅ Create database
(Optional)
- Save as template
- Generate scripts
Click Next.
Step 25: Prerequisite Checks
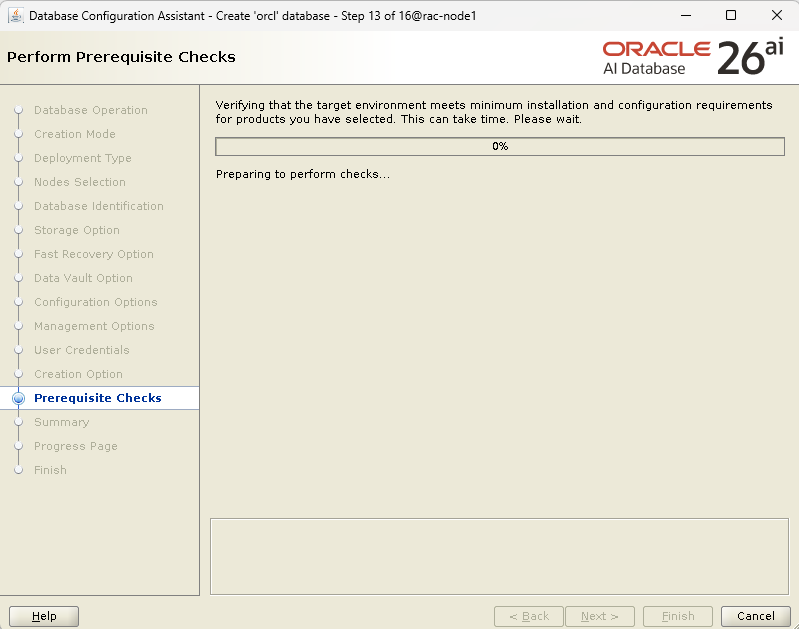
Allow DBCA to complete validation.
Click Next.
Step 26: Summary
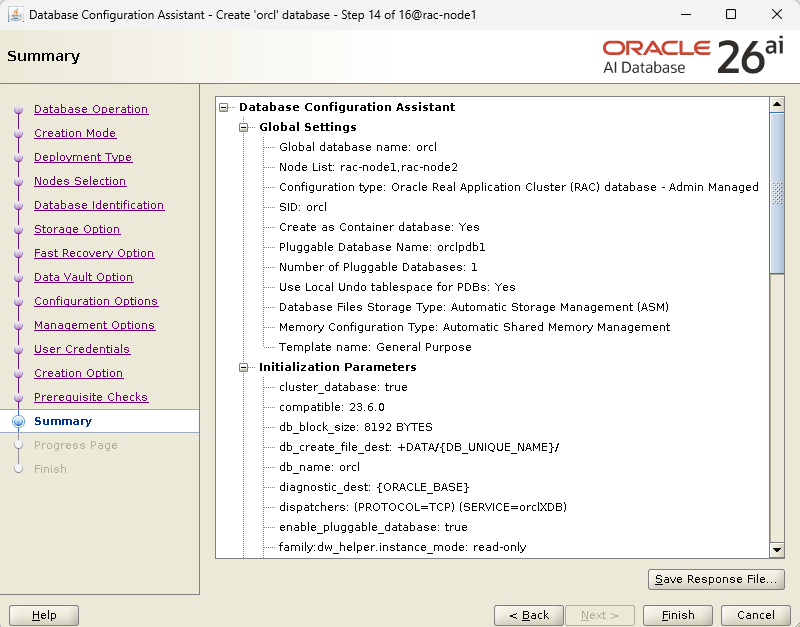
Review:
- RAC nodes
- CDB / PDB configuration
- ASM storage
- Memory settings
Click Finish.
Step 27: Database Creation Progress
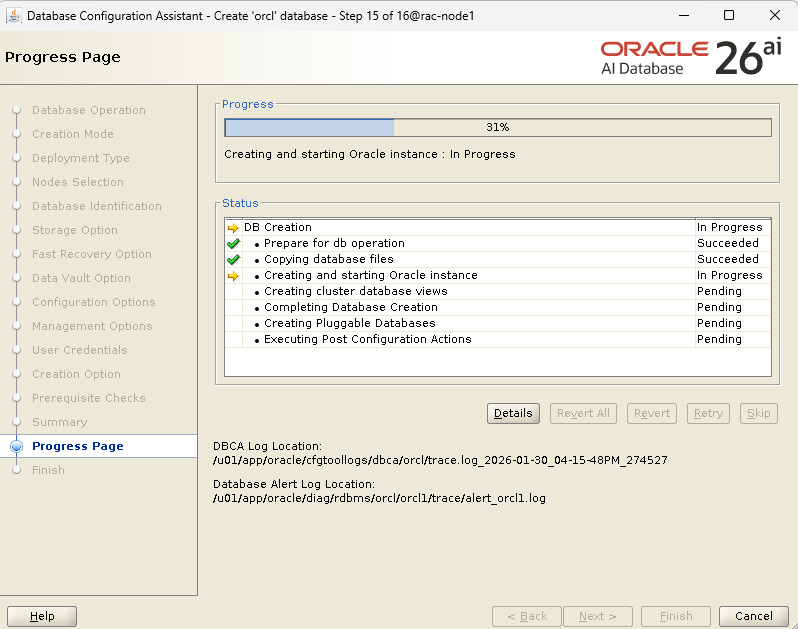
DBCA performs:
- Instance creation
- Database file copy
- Cluster views creation
- PDB creation
- Post-configuration actions
Step 28: Finish – Database Created Successfully
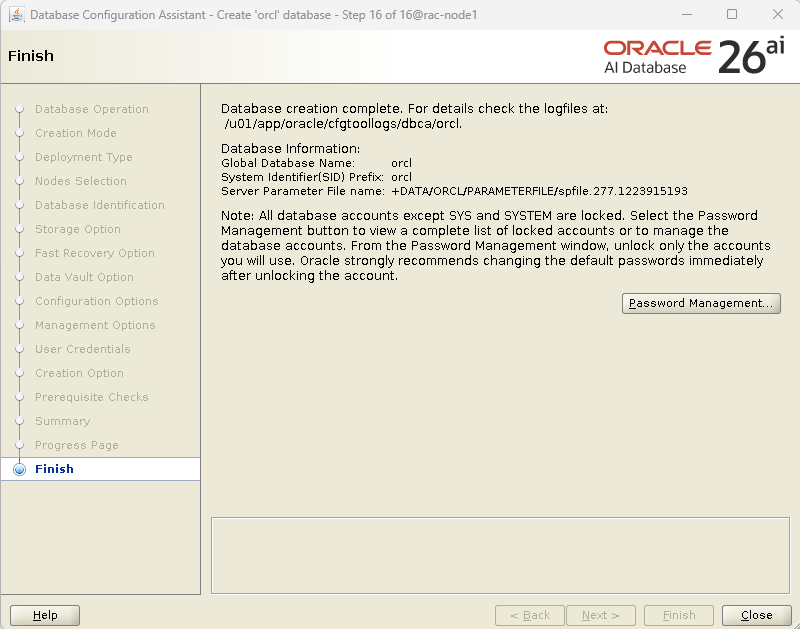
✅ Database creation complete
Key details:
- Global DB Name:
orcl - PDB:
orclpdb1 - SPFILE stored in ASM
- RAC-enabled database
Post-Creation Verification (Mandatory)
Run as oracle:
srvctl status database -d orcl

Instance orcl1 is running on node rac-node1
Instance orcl2 is running on node rac-node2

srvctl status instance -d orcl -n rac-node1
Instance orcl1 is running on node rac-node1

srvctl status instance -d orcl -n rac-node2
Instance orcl2 is running on node rac-node2
sqlplus "/as sysdba"

SQL*Plus: Release 23.26.1.0.0 - Production on Fri Jan 30 16:40:59 2026
Version 23.26.1.0.0

Copyright (c) 1982, 2025, Oracle.  All rights reserved.


Connected to:
Oracle AI Database 26ai Enterprise Edition Release 23.26.1.0.0 - Production
Version 23.26.1.0.0

SQL> SELECT inst_id, instance_name, status FROM gv$instance;

   INST_ID INSTANCE_NAME    STATUS
---------- ---------------- ------------
         1 orcl1            OPEN
         2 orcl2            OPEN

SQL>
crsctl stat res -t
--------------------------------------------------------------------------------
Name Target State Server State details
--------------------------------------------------------------------------------
Local Resources
--------------------------------------------------------------------------------
ora.LISTENER.lsnr
ONLINE ONLINE rac-node1 STABLE
ONLINE ONLINE rac-node2 STABLE
ora.chad
ONLINE ONLINE rac-node1 STABLE
ONLINE OFFLINE rac-node2 STABLE
ora.cvuadmin
OFFLINE OFFLINE rac-node1 STABLE
OFFLINE OFFLINE rac-node2 STABLE
ora.helper
OFFLINE OFFLINE rac-node1 STABLE
OFFLINE OFFLINE rac-node2 IDLE,STABLE
ora.net1.network
ONLINE ONLINE rac-node1 STABLE
ONLINE ONLINE rac-node2 STABLE
ora.ons
ONLINE ONLINE rac-node1 STABLE
ONLINE ONLINE rac-node2 STABLE
--------------------------------------------------------------------------------
Cluster Resources
--------------------------------------------------------------------------------
ora.ASMNET1LSNR_ASM.lsnr(ora.asmgroup)
1 ONLINE ONLINE rac-node1 STABLE
2 ONLINE ONLINE rac-node2 STABLE
ora.DATA.dg(ora.asmgroup)
1 ONLINE ONLINE rac-node1 STABLE
2 ONLINE ONLINE rac-node2 STABLE
ora.LISTENER_SCAN1.lsnr
1 ONLINE ONLINE rac-node1 STABLE
ora.asm(ora.asmgroup)
1 ONLINE ONLINE rac-node1 Started,STABLE
2 ONLINE ONLINE rac-node2 Started,STABLE
ora.asmnet1.asmnetwork(ora.asmgroup)
1 ONLINE ONLINE rac-node1 STABLE
2 ONLINE ONLINE rac-node2 STABLE
ora.cdp1.cdp
1 OFFLINE OFFLINE STABLE
ora.cvu
1 ONLINE ONLINE rac-node1 STABLE
ora.cvuhelper
1 OFFLINE OFFLINE STABLE
ora.orcl.db
1 ONLINE ONLINE rac-node1 Open,HOME=/u01/app/o
racle/product/23.26.
0.0/dbhome_1,STABLE
2 ONLINE ONLINE rac-node2 Open,HOME=/u01/app/o
racle/product/23.26.
0.0/dbhome_1,STABLE
ora.orcl.orcl_orclpdb1.svc
1 ONLINE ONLINE rac-node1 STABLE
2 ONLINE ONLINE rac-node2 STABLE
ora.orcl.orclpdb1.pdb
1 ONLINE ONLINE rac-node1 READ WRITE,STABLE
2 ONLINE ONLINE rac-node2 READ WRITE,STABLE
ora.rac-node1.vip
1 ONLINE ONLINE rac-node1 STABLE
ora.rac-node2.vip
1 ONLINE ONLINE rac-node2 STABLE
ora.rhpserver
1 OFFLINE OFFLINE STABLE
ora.scan1.vip
1 ONLINE ONLINE rac-node1 STABLE
--------------------------------------------------------------------------------
All instances should be OPEN and RUNNING.
Related Articles
- Installing Oracle Database 26AI on Red Hat Enterprise Linux 9
- Oracle AI Database 26ai – January 2026 Release Update (23.26.1.0.0)
- Oracle Grid Infrastructure 26ai Restart Installation – Complete Step-by-Step Guide
- Oracle Database 26ai RAC Installation – Part 1: Grid Infrastructure Setup
Conclusion
You have now successfully completed Oracle 26ai RAC installation:
- ✔ Grid Infrastructure (Part 1)
- ✔ Database Software Installation
- ✔ RAC Database Creation with DBCA
This setup is production-ready, scalable, and aligned with Oracle best practices.



Comments 2