

Installing Oracle WebLogic Server 14c on a Linux operating system can feel overwhelming — but with the right preparation, commands, and sequence, it’s actually very manageable. In this article, we’ll walk you through a practical, real-world installation on SUSE Linux Enterprise Server (SLES) — similar to how you would install on other enterprise Linux distributions such as Oracle Linux or RHEL.
Whether you’re preparing for a development environment, QA, or production deployment, this guide equips you with clear steps, tips, verification checks, and reminders to help you succeed.


What Is Oracle WebLogic Server 14c?
Oracle WebLogic Server is a powerful Java application server used for hosting enterprise Java applications, REST APIs, and distributed systems. The 14c release (14.1.x) supports Jakarta EE standards and provides a solid platform for enterprise workloads.
Prerequisites — Before You Begin
Before launching the installer, make sure your system meets several important requirements. These are based on the official installation guide for SUSE Linux Enterprise Server 15 SP2 but apply generically to Linux environments:
1. Supported OS and Hardware
Although this example uses SLES 15 SP2, most RHEL/Oracle Linux systems are similar in preparation. Your system should have:
- Minimum 1 GHz CPU
- At least 4 GB RAM
- Swap space ~ twice RAM
- Sufficient disk space: at least 2 GB in
/tmpand Linux filesystem space for software and logs.
2. User Setup
Install WebLogic as a non-root user (e.g., oracle). Root should only be used for package installs and system configuration, not the WebLogic installation itself.
You may also want a dedicated group such as oinstall for consistent permissions.
Install Java
WebLogic 14c requires a certified JDK. In the SUSE guide, JDK 8 is used, but Oracle now also supports JDK 11 and later for WebLogic.
Steps:
- Download the JDK (e.g., JDK 11 or JDK 8) from Oracle.
- Unpack it, e.g.:
tar -xzvf jdk-11.0.x_linux-x64_bin.tar.gz - Set environment variables by editing
~/.bash_profile:export JAVA_HOME=/path/to/jdk export PATH=$JAVA_HOME/bin:$PATH - Reload the profile:
source ~/.bash_profile
Prepare the System
Certain Linux kernel and system settings help support enterprise middleware:
File Limits & Shared Memory
Add the following to /etc/security/limits.conf:
oracle soft nofile 4096
oracle hard nofile 65536
oracle soft nproc 2047
oracle hard nproc 16384
oracle soft stack 10240
Then, adjust shared memory:
echo "kernel.shmmax = 4294967295" >> /etc/sysctl.conf
echo "kernel.shmall = 9272480" >> /etc/sysctl.conf
/sbin/sysctl -p
These tweaks ensure WebLogic and its JVM have enough resources.
Download the WebLogic 14c Installer
- Visit the official Oracle Middleware downloads page.
- Download the generic installer ZIP for WebLogic 14c (
fmw_14.1.1.0.0_wls_Disk1_1of1.zip). - Unzip it:
unzip fmw_14.1.1.0.0_wls_Disk1_1of1.zip
Inside you’ll find the installer JAR (e.g., fmw_14.1.1.0.0_wls.jar or similar).
Launching the Installation
Use Java to start the GUI installation wizard:
java -jar fmw_14.1.1.0.0_wls.jar
⚠️ Tip: If you encounter temp directory issues, specify temp location:
java -Djava.io.tmpdir=/your/tmpdir -jar fmw_14.1.1.0.0_wls.jar
Installation Wizard Walkthrough
The screens will generally follow this sequence:
Inventory Setup:
Specify the Oracle central inventory (like /u01/app/oraInventory) and group name (e.g., oinstall).

Welcome & Auto Updates:
Skip updates unless required.

Oracle Home:
Choose where WebLogic will be installed, e.g.: /u01/app/oracle/product/Middleware/Oracle_Home

Installation Type:
Typically “WebLogic Server” mode for standard servers.

Prerequisite Checks:
Validate environment and system properties.
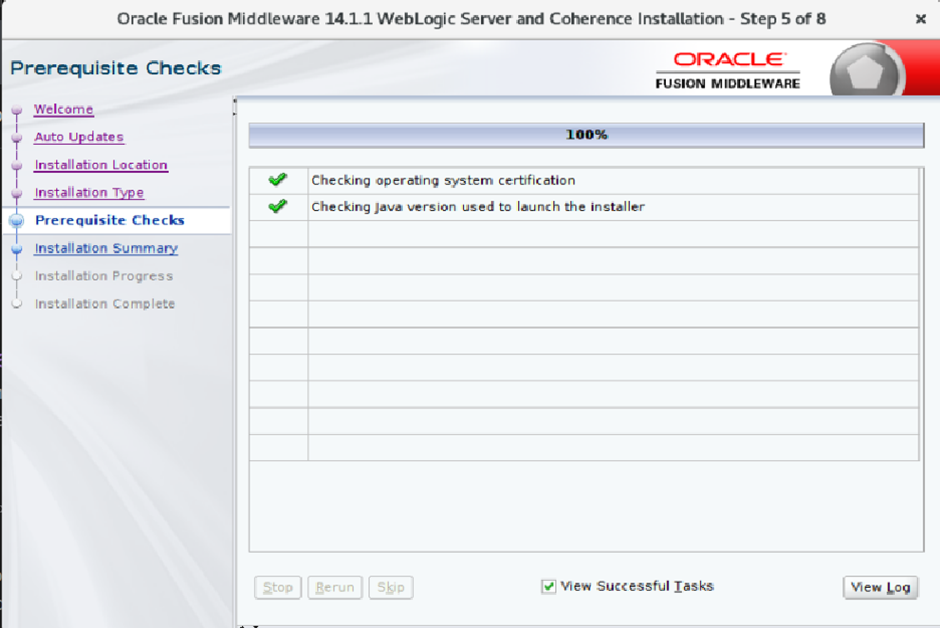
Install Summary → Install:
Confirm and proceed.

Finish:
You can select “Automatically Launch the Configuration Wizard” to begin building the domain.

🔧 Create the WebLogic Domain
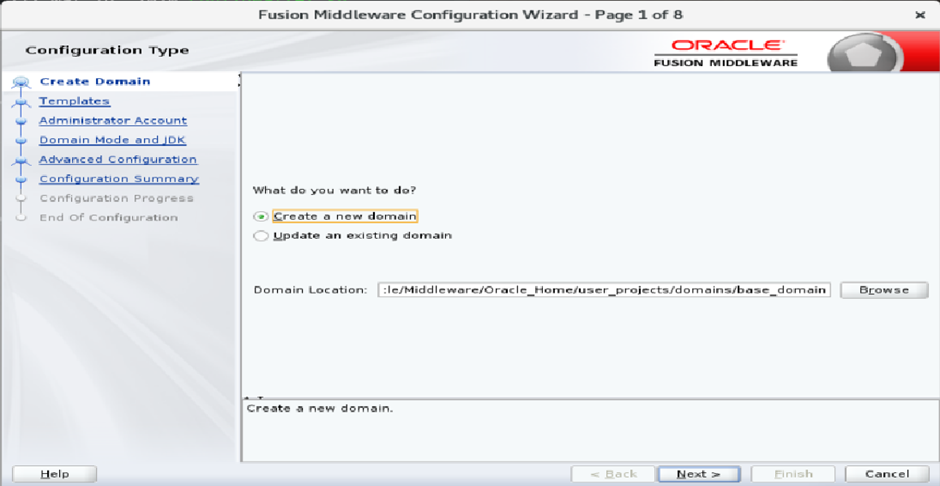
After installation, you need a domain — a logical group of server instances.
If you launched the Configuration Wizard automatically:
Choose “Create a New Domain”
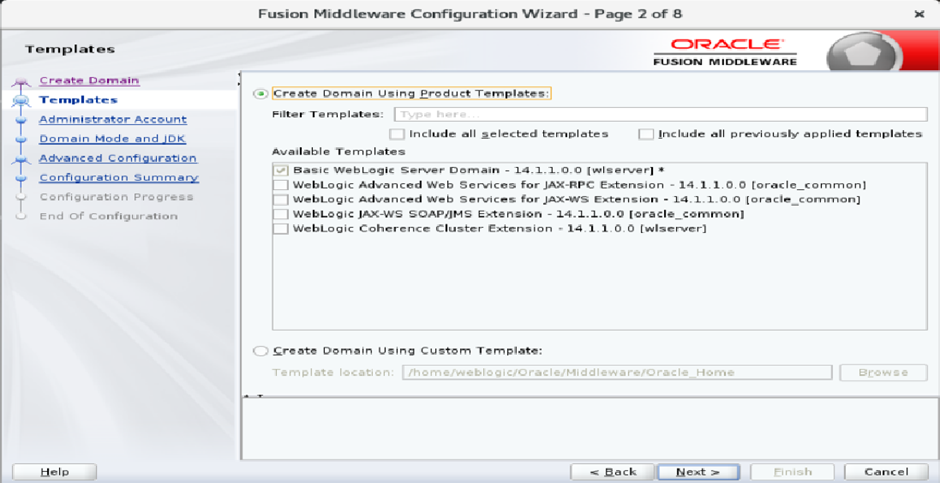
Pick templates (usually Basic WebLogic Server Domain)
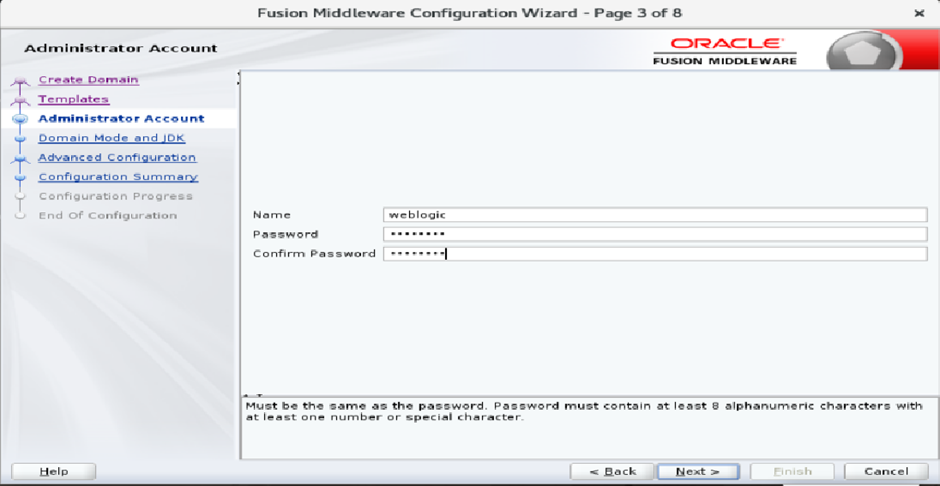
Set Admin username/password
Choose domain mode (Development vs Production)
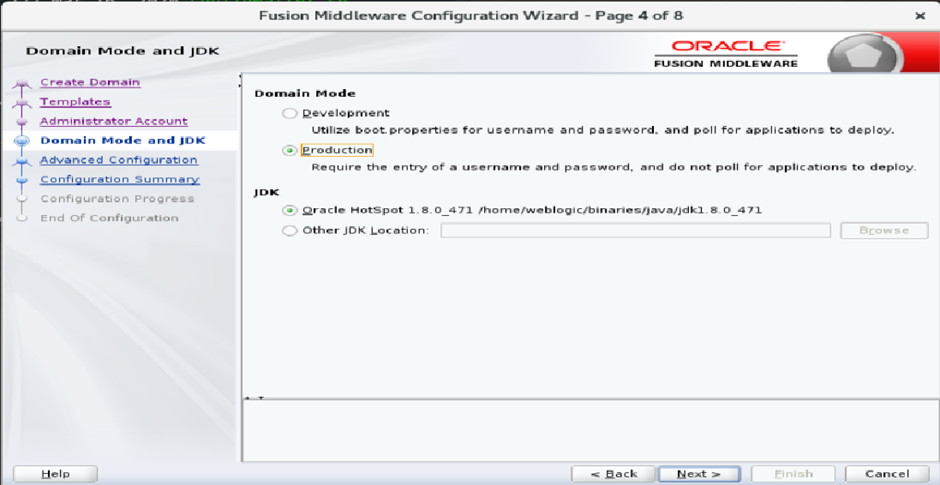


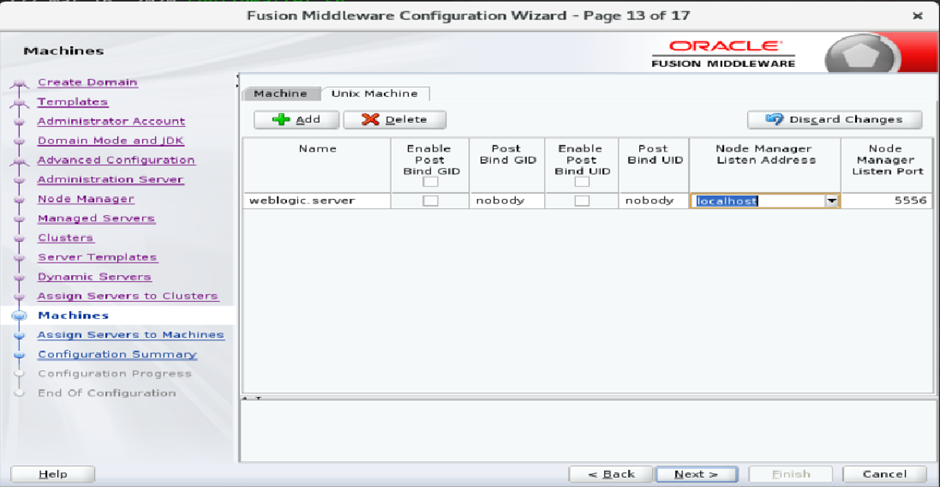
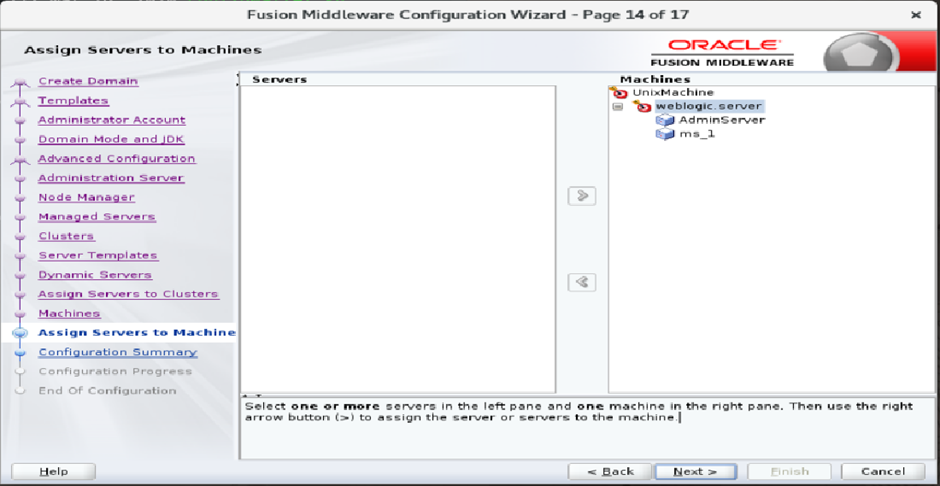
Confirm configuration → Create domain
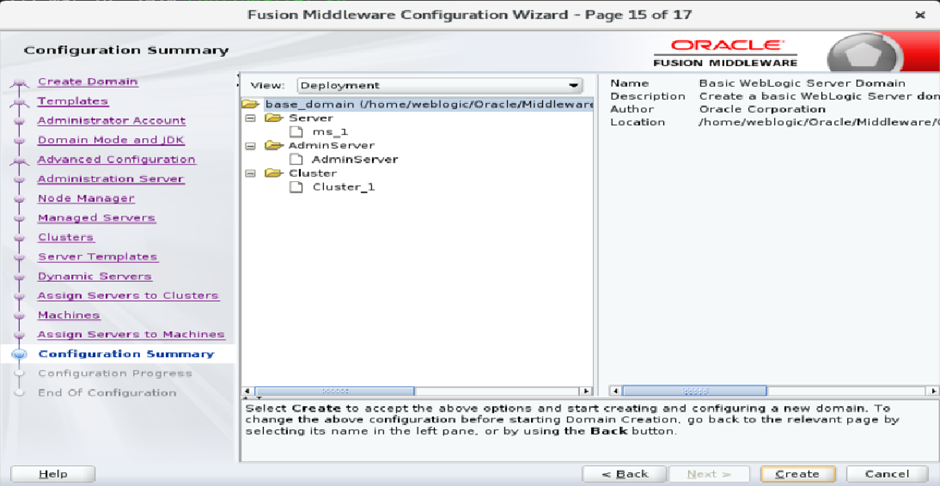
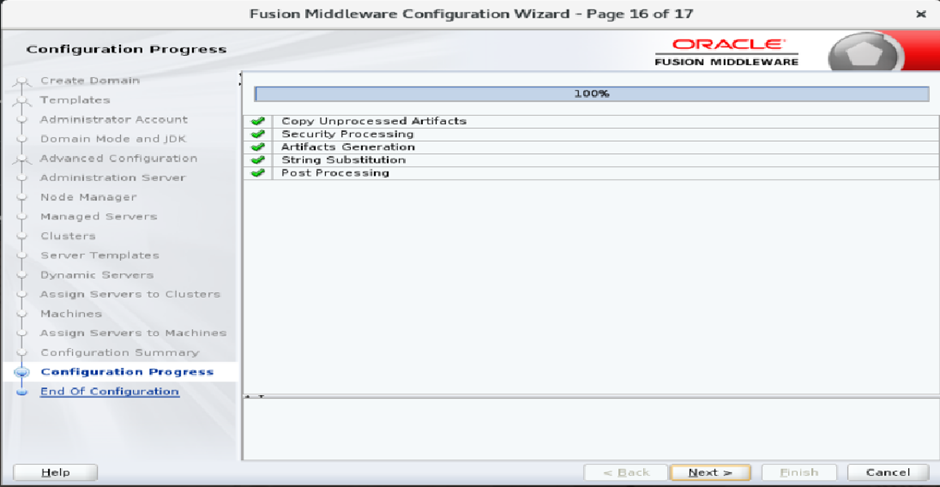
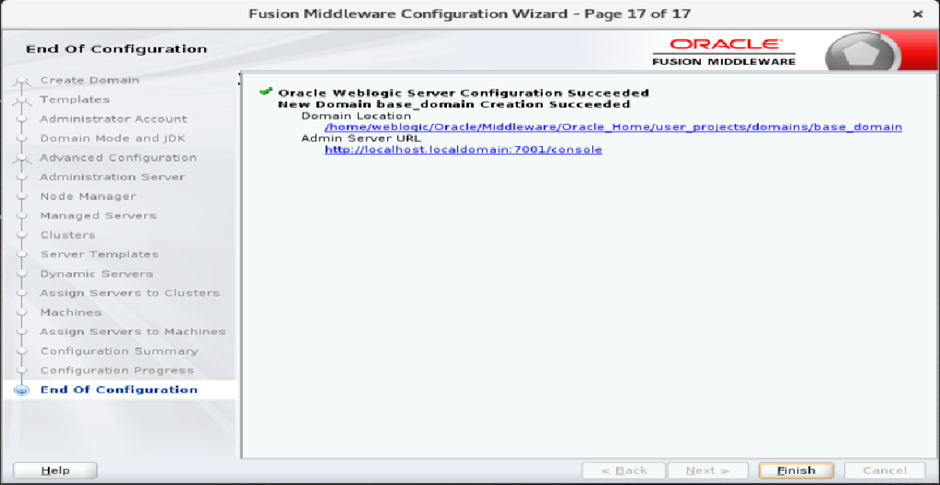
This will generate scripts and directory structure for your domain, e.g.:
$DOMAIN_HOME/bin/startWebLogic.sh
``` :contentReference[oaicite:8]{index=8}

---

## ▶️ Start the Admin Server

Navigate to:
```bash
cd $DOMAIN_HOME/bin
./startWebLogic.sh
You’ll see logs indicating that the AdminServer is up. By default, WebLogic listens on port 7001 unless changed.
Verify the Installation
Once the admin server is running, open a browser and go to:
http://<server-ip>:7001/console
You should see the WebLogic Administration Console login page.
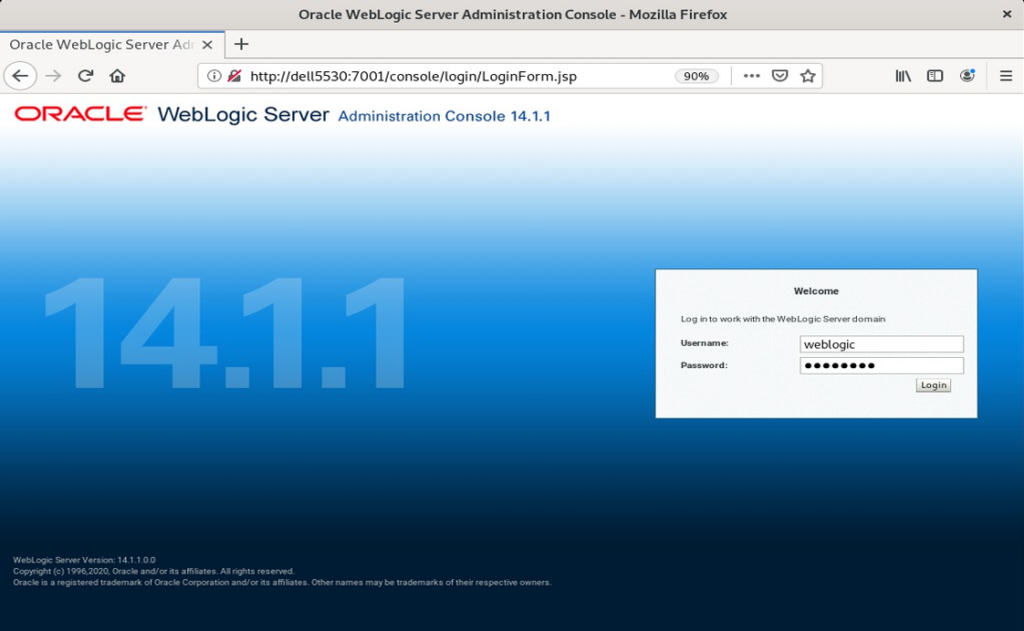
Log in with the admin credentials you set earlier — this confirms a successful installation.
Post-Installation Tips
✔ Keep the installation in version control
Document your inventory directory, middleware home, and domain locations for future maintenance.
✔ Automate creating domains
Consider WLST (WebLogic Scripting Tool) for scripting domain creation in CI pipelines.
✔ Monitor logs proactively
Check logs under $DOMAIN_HOME/servers/AdminServer/logs regularly.
✔ Backup domain configuration
Always backup config.xml before major changes.
Conclusion
Installing Oracle WebLogic Server 14c on Linux is a structured process if you prepare your system, install the correct JDK, launch the installer properly, and configure your domain with care. Whether you’re doing this for the first time or setting up a repeatable process for teams, these guidelines will help you achieve a smooth install.


